配置软件源
更新系统:1
2sudo apt update
sudo apt-get upgrade
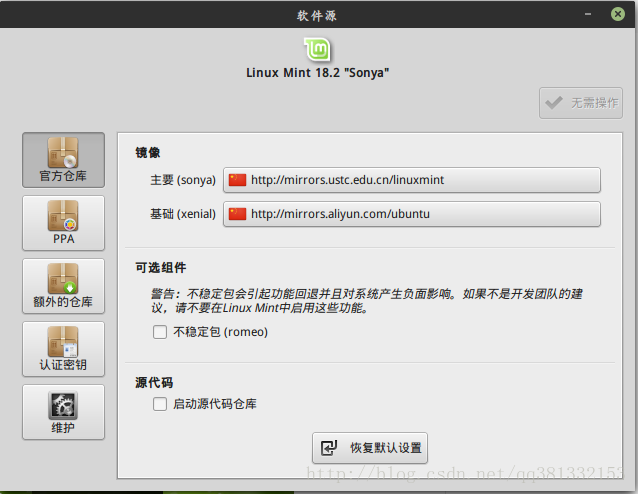
这里选择网络连接最快的源
中文输入法问题
作为开发机器装好系统第一件事就是中文输入法的配置,在安装的时候选择中文语言会自动下载相关的语言包。
1) 使用系统默认的fcitx的拼音输入法:
发现输入中文的时候根本看不到候选框。解决办法:1
2sudo apt purge fcitx-ui-qimpanel
sudo apt-get install fcitx-config-gtk
在附加组件把qimpanel勾选去掉
原因是fcitx跟QT冲突
2) 使用sogou输入法:
下载地址:http://cdn2.ime.sogou.com/dl/index/1491565850/sogoupinyin_2.1.0.0086_amd64.deb?st=91JBmvFURKntLXuHf1VhkA&e=1508982588&fn=sogoupinyin_2.1.0.0086_amd64.deb
安装:1
2sudo apt install libopencc2 libopencc1 fcitx-libs fcitx-libs-qt
sudo dpkg -i sogoupinyin_2.1.0.0086_amd64.deb
3) 卸载重新安装1
2
3
4sudo apt purge fcitx*
sudo dpkg -i sogoupinyin_2.2.0.0102_amd64.deb
sudo apt install -f
sudo apt install fcitx-ui-classic fcitx-ui-light
安装之前需要安装依赖包,然后我们开始输入中文,发现候选框全是一堆乱七八糟的字母数字。
解决:在fcitx-config中启用Kimpanel,然后注销登录之后发现可以正常使用了。
完成后注销重新登录即可。
总结
如果使用搜狗输入法就要开启Kimpanel支持
如果使用fcitx自带的输入法则需要关闭该选项
安装oraclejava
添加源1
2sudo add-apt-repository ppa:webupd8team/java
sudo apt-get update
JDK7 默认选择条款
echo oracle-java7-installer shared/accepted-oracle-license-v1-1 select true | sudo /usr/bin/debconf-set-selections
JDK8 默认选择条款
echo oracle-java8-installer shared/accepted-oracle-license-v1-1 select true | sudo /usr/bin/debconf-set-selections
Oracle Java 81
sudo apt-get install oracle-java8-installer
jdk71
sudo apt-get install oracle-java7-installer
设置系统默认jdk
JDk7sudo update-java-alternatives -s java-7-oracle
JDK8sudo update-java-alternatives -s java-8-oracle
如果即安装了jdk7,又安装了jdk8,要实现两者的切换,可以:
jdk8 切换到jdk7
sudo update-java-alternatives -s java-7-oracle
jdk7 切换到jdk8
1 | sudo update-java-alternatives -s java-8-oracle |
安装各种版本openjdk
1 | sudo add-apt-repository ppa:openjdk-r/ppa |
1 | sudo apt-get install openjdk-6-jdk |
切换版本1
2sudo update-alternatives --config java
sudo update-alternatives --config javac
安装网易云音乐
下载地址:http://s1.music.126.net/download/pc/netease-cloud-music_1.0.0-2_amd64_ubuntu16.04.deb1
2sudo apt install libqt5multimediawidgets5
sudo dpkg -i netease-cloud-music_1.0.0-2_amd64_ubuntu16.04.deb
或者直接sudo apt install netease-cloud-music
安装解码和flash插件
sudo apt install flashplugin-installer gstreamer1.0-fluendo-mp3 ttf-mscorefonts-installer
安装MySQL
sudo apt-get install mysql-server mysql-common
安装过程会提示输入root密码,使用sudo mysql -uroot -p测试安装结果
安装chrome
下载地址:http://www.google.cn/chrome/browser/desktop/index.html?standalone=1
访问不了可以下载这个:http://download.csdn.net/download/qq381332153/10039953sudo dpkg -i google-chrome-stable_current_amd64.deb
安装Android Studio
开启32位包支持sudo dpkg --add-architecture i386
下载地址:https://developer.android.google.cn/studio/install.html
启动过程中提示设置代理下载SDK,地址设置为:mirrors.neusoft.edu.cn,端口80
开机挂在文件系统
在/etc/fstab可以配置系统启动的时候挂在指定文件系统。在双系统中我们一般会去挂载WIN下的磁盘:1
2
3
4
5
6
7
8
9
10
11
12
13
14
15
16
17
18
19
20
21
22
23
24
25
26
27
28
29# /etc/fstab: static file system information.
#
# Use 'blkid' to print the universally unique identifier for a
# device; this may be used with UUID= as a more robust way to name devices
# that works even if disks are added and removed. See fstab(5).
#
# <file system> <mount point> <type> <options> <dump> <pass>
# / was on /dev/sdb7 during installation
UUID=d281aec2-a293-45e0-868b-546c763fbdd2 / ext4 errors=remount-ro 0 1
# /boot/efi was on /dev/sdb2 during installation
UUID=861D-7C13 /boot/efi vfat umask=0077 0 1
# /home was on /dev/sdb8 during installation
UUID=e1bfa6c7-6a21-45c4-81c2-48ac209fc2c7 /home ext4 defaults 0 2
#C
UUID=66CC2017CC1FDFDB /media/C ntfs defaults,user,rw,iocharset=utf8,umask=000,nls=utf8 0 3
#D
UUID=503EC4343EC414BE /media/D ntfs defaults,user,rw,iocharset=utf8,umask=000,nls=utf8 0 4
```
上边我配置了C和D盘的启动自动挂载,文件系统格式是NTFS,UUID可以通过命令查看。其中每项的说明如下:
gongxufan@gongxufan-ThinkPad-E460 ~ $ blkid
```sql
/dev/sda1: LABEL="M-fM-^AM-\"M-eM-$M-^M" UUID="92501C01501BEB2D" TYPE="ntfs" PARTLABEL="Basic data partition" PARTUUID="b50dc9c9-eb35-499d-b02c-ee8378a63282"
/dev/sda2: UUID="861D-7C13" TYPE="vfat" PARTLABEL="EFI system partition" PARTUUID="6ecc9e85-c8a0-4623-b6f6-94bef54c975d"
/dev/sda4: LABEL="C" UUID="66CC2017CC1FDFDB" TYPE="ntfs" PARTLABEL="Basic data partition" PARTUUID="cffc126d-484f-4b08-8462-c99f103a8175"
/dev/sda5: UUID="0E201336201323ED" TYPE="ntfs" PARTUUID="2a95117a-f37c-4034-b298-da7d57ed0985"
/dev/sda6: LABEL="D" UUID="503EC4343EC414BE" TYPE="ntfs" PARTLABEL="Basic data partition" PARTUUID="8fcb1827-9fed-4c71-9a82-f524d973c8ad"
/dev/sda7: UUID="d281aec2-a293-45e0-868b-546c763fbdd2" TYPE="ext4" PARTUUID="ecd02f18-c001-4b32-888b-f2e28515116c"
/dev/sda8: UUID="e1bfa6c7-6a21-45c4-81c2-48ac209fc2c7" TYPE="ext4" PARTUUID="6c2cbde7-ac4e-4beb-a863-958f5cb2bbf7"
接着是挂载点,需要自己在系统预先创建好目录
第三项是目标文件系统的格式
接着是参数,一般中文的要设置UTF8,还有读写权限等
再接着是否备份,一般设置为0就可以
最后是fsck磁盘自检顺序,设置0表示不进行自检
最后可以通过sudo mount -a测试配置正确。
home目录下模板目录的管理
默认情况下会有Downloads,Docments等模板目录,这些目录是根据语言来设置。具体如下:1
2
3
4gongxufan@gongxufan-ThinkPad-E460 ~/.config $ ls
autostart cinnamon-session enchant filezilla gtk-3.0 menus netease-cloud-music SogouPY tomboy user-dirs.locale xplayer
caja cobinja fcitx google-chrome hexchat mimeapps.list pix SogouPY.users Trolltech.conf VirtualBox xviewer
chromium dconf fcitx-qimpanel gtk-2.0 libreoffice nemo pulse sogou-qimpanel user-dirs.dirs xed
其定义:1
2
3
4
5
6
7
8
9
10
11
12
13
14
15
16gongxufan@gongxufan-ThinkPad-E460 ~/.config $ cat user-dirs.dirs
# This file is written by xdg-user-dirs-update
# If you want to change or add directories, just edit the line you're
# interested in. All local changes will be retained on the next run
# Format is XDG_xxx_DIR="$HOME/yyy", where yyy is a shell-escaped
# homedir-relative path, or XDG_xxx_DIR="/yyy", where /yyy is an
# absolute path. No other format is supported.
#
XDG_DESKTOP_DIR="$HOME/Desktop"
XDG_DOWNLOAD_DIR="$HOME/下载"
XDG_TEMPLATES_DIR="$HOME/模板"
XDG_PUBLICSHARE_DIR="$HOME/公共的"
XDG_DOCUMENTS_DIR="$HOME/文档"
XDG_MUSIC_DIR="$HOME/音乐"
XDG_PICTURES_DIR="$HOME/图片"
XDG_VIDEOS_DIR="$HOME/视频"
该模板是根据l语言自动设置的:
user-dirs.locale文件定义了当前的语言
查看硬件信息并保存到html文件
sudo lshw -html > ~/hw.html
安装numpy
for python3+sudo apt-get install python3-numpy python3-scipy python3-matplotlib ipython3 ipython3-notebook python3-pandas python-sympy python3-nose
for python2+sudo apt-get install python-numpy python-scipy python-matplotlib ipython ipython-notebook python-pandas python-sympy python-nose
禁用笔记本触摸板
禁用 sudo rmmod psmouse
开启 sudo modprobe psmouse
注意这里执行禁用会把触点功能也关闭,如果只禁用触摸板的可以安装pointing-device
安装redis
sudo apt-get install redis-server
查看进程
1 | gongxufan@gongxufan-ThinkPad-E460 ~ $ ps -aux|grep redis |
查看服务状态
1 | gongxufan@gongxufan-ThinkPad-E460 ~ $ sudo /etc/init.d/redis-server status |
查看服务端口
1 | gongxufan@gongxufan-ThinkPad-E460 ~ $ netstat -nlt|grep 6379 |
客户端访问
1 | gongxufan@gongxufan-ThinkPad-E460 ~ $ redis-cli |
安装nginx
sudo apt-get install nginx
配置文件位于:/etc/nginx
服务启动控制:1
2
3
4
5#重新加载配置
sudo service nginx reload
#启动停止
sudo service nginx restart
sudo service nginx stop
也可以这样1
2
3
4
5
6nginx -s signal
stop — fast shutdown
quit — graceful shutdown
reload — reloading the configuration file
reopen — reopening the log files
github
将现有项目添加到git
1 | git init |
同步fork
首先要先确定一下是否建立了主repo的远程源:git remote -v
如果里面只能看到你自己的两个源(fetch 和 push),那就需要添加主repo的源:1
2git remote add upstream URL
git remote -v
然后你就能看到upstream了。
如果想与主repo合并:1
2git fetch upstream
git merge upstream/master